

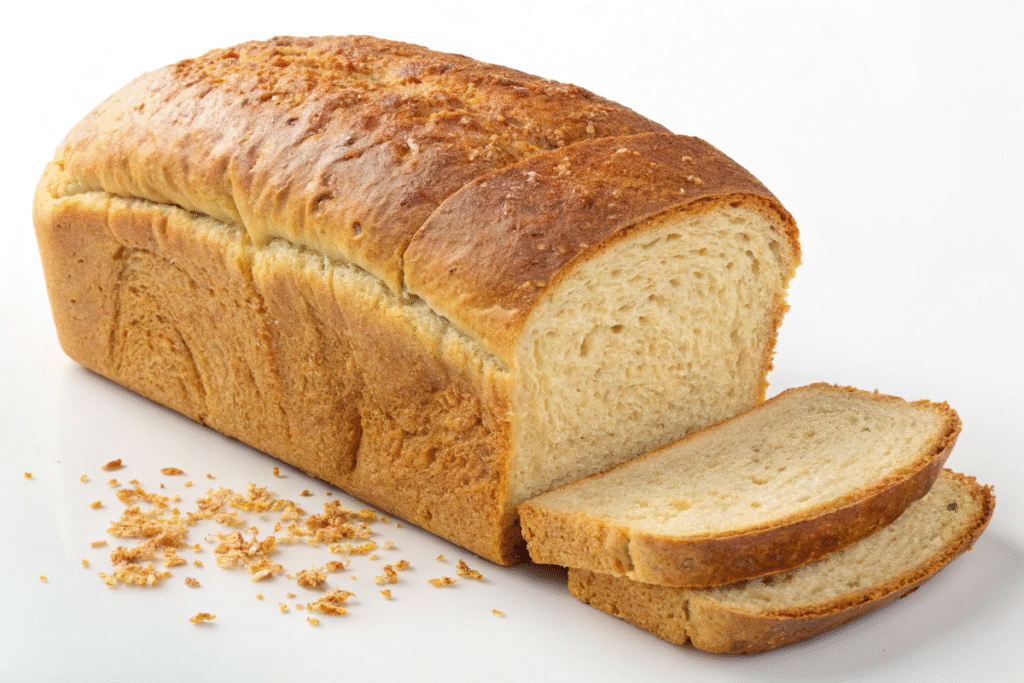
Are you looking for Whole Wheat Sandwich Bread Recipe? Making your own whole wheat sandwich bread is not only a rewarding experience, but it also offers a healthier alternative to store-bought bread. With its rich, hearty texture, whole wheat bread is a perfect foundation for sandwiches or even for a wholesome toast in the morning. It provides an excellent source of fiber, vitamins, and minerals that contribute to a well-balanced diet.
Unlike refined white bread, whole wheat bread is made from the entire wheat kernel, which helps preserve all the nutritional benefits of the grain. This guide will walk you through the process of making soft and fluffy whole wheat sandwich bread in your own kitchen, and we will also explore the numerous health benefits that come with it.
To begin your bread-baking journey, it’s crucial to understand the importance of high-quality ingredients. Bob’s Red Mill Whole Wheat Flour is an ideal choice for ensuring your bread has the perfect texture and flavor. The quality of the flour plays a significant role in the outcome of the bread, so choosing the best product is key.
Why Whole Wheat Bread is a Healthier Choice
Choosing whole wheat bread over white bread is more than just a trend—it’s a commitment to improving your health. Here’s why you should make the switch:
- High in Nutrients: Whole wheat flour contains more fiber, B vitamins, and minerals like iron and magnesium compared to white flour.
- Supports Digestive Health: The fiber in whole wheat promotes a healthy gut by improving digestion and preventing constipation.
- Aids in Weight Management: The fiber in whole wheat bread helps you feel fuller for longer, reducing the likelihood of overeating.
- Better for Heart Health: Consuming whole grains has been linked to a lower risk of heart disease. This is because whole wheat contains essential fatty acids and antioxidants that support heart health.
For those looking to explore more benefits of whole grains, Libby’s Pumpkin Bread Recipe highlights how incorporating grains like whole wheat into your diet can provide nutritional benefits that contribute to overall wellness.
Essential Ingredients for Whole Wheat Sandwich Bread
Making whole wheat sandwich bread requires only a few simple ingredients that can be found in most kitchens. Here’s what you’ll need:
- Whole Wheat Flour – The main ingredient that gives this bread its dense and hearty texture.
- Active Dry Yeast – The yeast is responsible for making the bread rise and gives it a soft, airy texture.
- Honey – Adds a slight sweetness to the bread and also helps activate the yeast during the rising process.
- Warm Water – The warmth activates the yeast and helps it grow, making the dough rise effectively.
- Butter – Adds richness and makes the bread soft and moist.
- Salt – Enhances the flavor and strengthens the dough structure.
- Milk – Adds moisture, ensuring that the bread is soft and flavorful.
Optional Add-ins:
- Seeds or Nuts – For added texture and flavor. You can add sunflower seeds, flax seeds, or even chopped walnuts for an extra crunch.
- Herbs – Experiment with adding dried herbs like rosemary or thyme for a savory twist on your bread.
When you have all your ingredients, you’re ready to get started!
Step-by-Step Guide to Making Whole Wheat Sandwich Bread
1. Preparing the Dough
- In a large bowl, combine 3 ½ cups of whole wheat flour, 2 teaspoons of active dry yeast, and 1 tablespoon of salt. Mix them thoroughly.
- Pour in 1 cup of warm water (around 100°F), followed by ¼ cup of honey. Stir the mixture until the honey is dissolved and everything is well combined.
- Gradually add ¼ cup of melted butter and ½ cup of milk to the mixture. Keep stirring until the dough comes together and forms a rough ball.
At this point, the dough will seem sticky, but that’s okay. If you find it too sticky to handle, slowly add more flour, but be careful not to overdo it. The key is to get a dough that’s soft but not overly sticky.
2. Kneading the Dough
Now, it’s time to knead the dough. Kneading is an essential step to create the right texture in your bread. It helps develop the gluten, which makes the bread rise properly and become soft.
- Turn the dough onto a floured surface and knead it for about 8-10 minutes until it becomes smooth and elastic.
- If using a stand mixer, fit it with a dough hook and knead the dough on a low speed for about 5 minutes.
The dough should feel soft but not sticky. Once you’re happy with the consistency, move on to the next step.
3. Letting the Dough Rise
- Form the dough into a ball and place it into a greased bowl. Cover the bowl with a clean towel.
- Let the dough rise in a warm place for about 1 to 2 hours, or until it has doubled in size. If you live in a cooler climate, you can place the dough near a warm oven to help with the rise.
Patience is key during this step—let the yeast do its work to ensure the dough becomes light and airy.
4. Shaping the Dough
- Once the dough has risen, punch it down to release any air bubbles.
- Transfer the dough onto a floured surface and shape it into a loaf. The goal is to make a tight, smooth loaf that fits perfectly into a 9×5-inch loaf pan.
Once you have shaped the dough, place it into the greased pan and cover it again with a towel. Allow the dough to rise for an additional 1 hour.
5. Baking the Bread
- Preheat your oven to 350°F (175°C).
- Once the dough has risen, bake it for 30-35 minutes or until the top is golden brown. You can tap the bottom of the loaf—if it sounds hollow, it’s ready.
- Let the bread cool on a wire rack before slicing it.
Common Mistakes and How to Avoid Them
Making whole wheat bread at home is rewarding, but there are some common mistakes that many bakers make. Here’s how you can avoid them:
- Dense Bread: If your bread is too dense, it might not have risen enough. Make sure the dough has enough time to rise properly. You can also add a little more yeast to encourage a better rise.
- Dry Bread: If your bread turns out dry, it may have been over-baked. Use a thermometer to check the internal temperature of the bread—it should read 190°F (88°C) when done.
- Sticky Dough: If your dough is too sticky, you may have added too much water. Gradually add more flour until it reaches the right consistency, but don’t overdo it.
Storing and Freezing Whole Wheat Bread
Homemade bread doesn’t last forever, so here are a few tips on storing it properly:
- Room Temperature: Store your whole wheat sandwich bread at room temperature for 3-4 days. Wrap it in a kitchen towel or place it in a bread box to keep it fresh.
- Freezing: If you want to store the bread for a longer period, slice it up and freeze it. This way, you can pull out a slice whenever you need it. Make sure to wrap the bread tightly in plastic wrap and store it in a freezer-safe bag.
Serving Ideas for Whole Wheat Sandwich Bread
Your whole wheat sandwich bread is versatile and can be used in numerous ways:
- Classic Sandwiches: Whether it’s a turkey sandwich or a simple peanut butter and jelly combo, whole wheat bread makes a delicious base.
- Toast: For breakfast, lightly toast a slice of bread and top it with avocado or your favorite jam.
- French Toast: For a twist on the classic French toast, use whole wheat bread for a more nutritious breakfast option.
FAQs About Whole Wheat Sandwich Bread Recipe

- How do I make whole wheat bread less dense?
Ensure you give the dough enough time to rise and don’t over-knead it. Adding a bit more water or milk can help the bread stay light and fluffy. - Can I substitute whole wheat flour with white flour?
Yes, but the texture and flavor will be different. Whole wheat flour will give the bread a denser texture compared to white flour. - Can I add seeds or nuts to whole wheat bread?
Absolutely! You can experiment with adding seeds like sunflower or flax seeds for an added crunch and flavor. - How do I know when my bread is fully baked?
The best way to check is by tapping the bottom of the loaf—if it sounds hollow, it’s done. You can also use a thermometer to check that the internal temperature reaches 190°F (88°C).
Conclusion
Now that you’ve learned how to bake whole wheat sandwich bread, you can enjoy healthier, homemade bread every day. This recipe is simple yet incredibly rewarding, allowing you to experiment with different variations as you become more comfortable in the kitchen.